MOTOBRICK.COM
TECHNICAL MOTOBRICK WRENCHING In Remembrance of Inge K. => The Motobrick Workshop => Topic started by: Martin on January 27, 2018, 12:45:22 AM
-
I managed to get a mint dash pad and one non working OEM hazard switch of Ebay. I was the only bidder and was expecting a fight but got it for $15.00 Au plus $17.00 Au for freight. I can't remember when one in good condition or for that matter any condition turned up. On arrival took all of two minutes to get the switch working just sprayed heaps of contact cleaner into it and let it soak for two minutes and away it went. The dash pad on my brick has two non OEM switches which protrude at both ends and necessitated enlarging the holes. Got some advice from Rob (RBM) on fitting LED's. Got some LED's and the wrong resistors from Jaycar they gave me 510K ohm ones instead of 510 ohm ones. It took a while to realize the error but I had bought two packs at different times. When I couldn't get a reading on any of the resistors in the first pack I switched to the second pack and got a reading. It was then I saw the mistake. After filing out the groove in the switch where the wire for the globe originally ran to take the resistor. I gave up after I discovered that the contacts I would be using for the LED differed from the globe. :dunno and things became complicated. I then drilled two holes through the base of the lamp socket and wired up everything from the back. Wasn't real happy with the brightness so went and got brighter LED's and different resistors. Very easy to change now with everything on the back, heaps better now. I scored another switch last Monday along with a couple of indicators and a tail light. This switch was a heated grip switch which is now wired so middle is off up or down is on. The hazard switch which is now my LED light bar and Horn of Death switch is wired centre is off down is on up is flash. I decided to try and match the symbols to the new function, so I popped out both marking plates. Due to their size they were hard to work on so a hot glued them to the soft jaws on my vice and used fine emery paper to remove the symbols. I then used my air grinder with a cotton mop and plastic polish to finish them off. I picked up some switch stickers from Supercheap but I think they could be improved on. I have some small stick on labels which i am going to try and cut out the required symbol to use as masking and then spray or use a small brush. If you want to light up your switches it is far easier to drill two small holes in the base of the light socket and poke the LED through and solder on the resistor on the back of the switch.
Regards Martin.
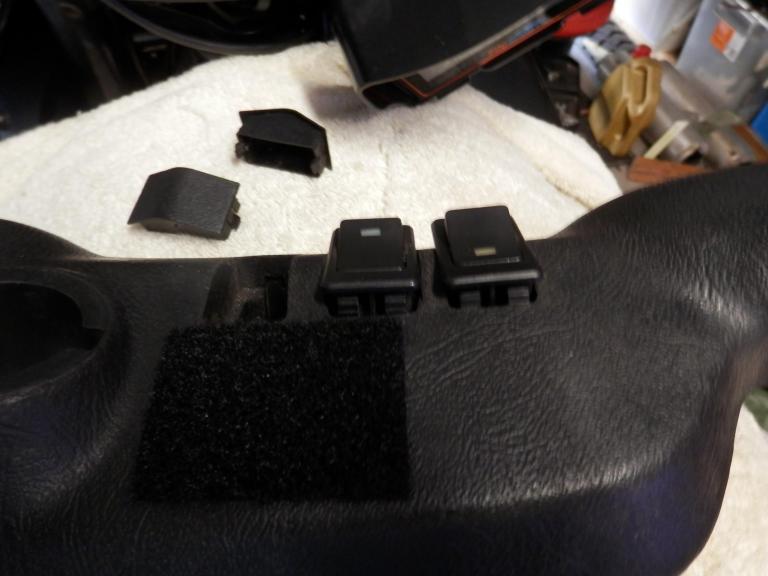
 Dash Switch non OEM 1.jpg (43.92 kB . 768x576 - viewed 527 times)
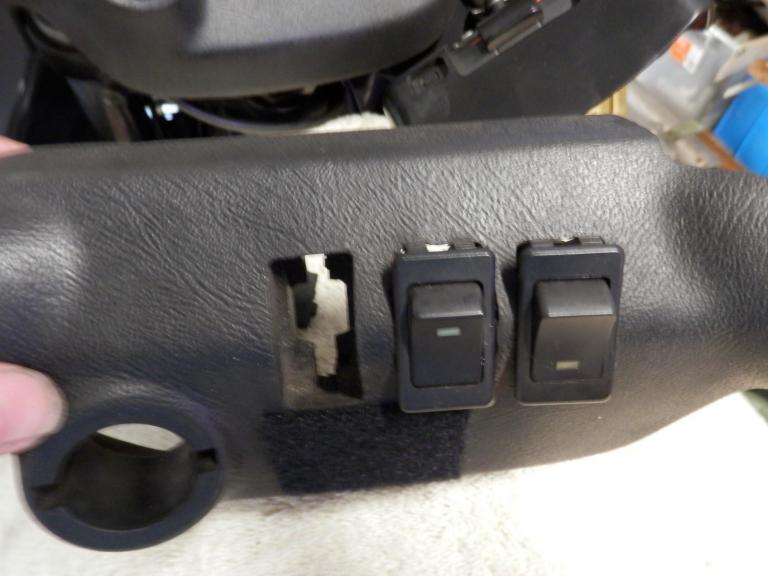
Dash Switch non OEM 2.jpg (46.78 kB . 768x576 - viewed 555 times)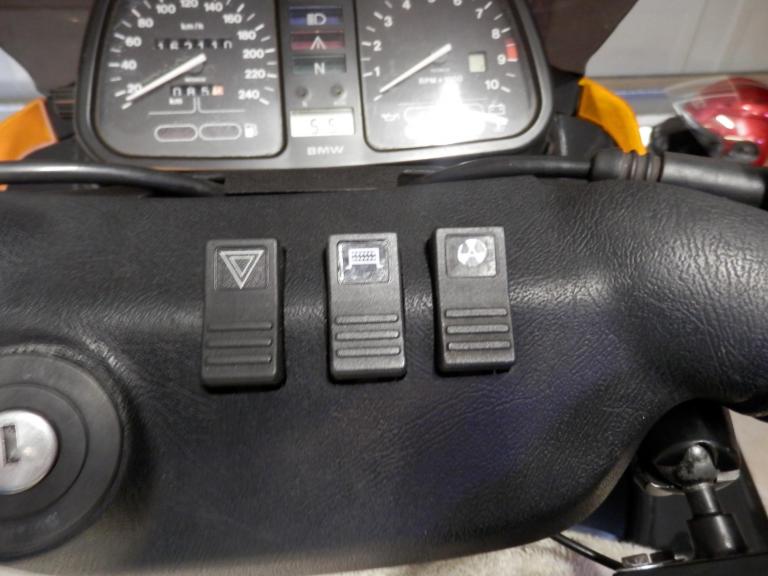
Dash Switch OEM 1.jpg (53.1 kB . 768x576 - viewed 528 times)
Dash Switch OEM 2.jpg (50.14 kB . 768x576 - viewed 542 times)
-
The BMW Corporate Asshat I want to meet is the one who determined that it would be fun to design it such that you have to dig the switch wires out of the wiring bundle at the terminal ends in order to withdraw the switch out the top side before removing the dash pad.
I guess I could have de-soldered the wires at the back of the switches. Grrr!
-
I rewired all my switches with two and three pin automotive connectors from Jaycar. I took the pad with me and made sure the connectors were capable of being pushed through the pad. The only other problem was my original pad had been reduced in width due to the bars being moved up and backwards. Rather than cut the new pad I moved the perches put 10mm on both sides this will now necessitate modifying my bar end mirrors which were made for bicycles. The internal expanding clamps grip which was minimal at best, and did initially result in mirrors falling off is now non existant. :nono On the original pad I also had to extend the brackets off the back of the pad due to the repositioning of the bars. But all minor problems and I am a lot happier with the result. I am pretty sure that going down the non OEM switch route wouldn't have worked due to the design of the K75s pad. :dunno
Regards Martin.